Pear Apple Juice Recipe
Ripe pear and apple — a mild white-brown winter glass that beginners finish without bitterness.
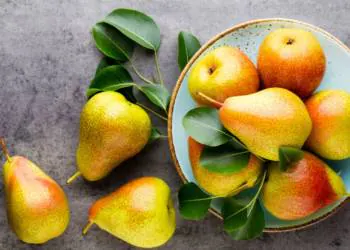
Ingredients
- 3 ripe pears, cored
- 2 apples, cored
- Optional: ½ lemon, peeled
Steps
- Wash and core pears and apples. Soft pears juice better when still slightly firm.
- Juice apple and pear — or blend with a splash of water and strain.
- Stir; add lemon for brightness.
- Serve cold.
Nutrition (per serving)
Kitchen estimate from typical produce weights and juice extraction — not lab-analyzed. Juicing leaves most fiber in the pulp; values are for the drinkable juice, not whole fruit or vegetables. Not medical advice.
Serving size: 1 glass
- Calories
- 141 kcal
- Fat
- 0.4 g
- Carbohydrates
- 37.4 g
- Fiber
- 1.2 g
- Sugars
- 25.7 g
- Protein
- 0.9 g
If bottled blends taste flat or syrupy, pear apple juice is the reset — fresh 3 ripe pears, 2 apples, short steps, and machine tips that reduce clogging and bitterness without miracle claims.
Who this is for
Aimed at everyday juicing, not spa menus. If you hate dessert-leaning fruit glasses, adjust fruit ratios before you blame the machine.
Produce picks and prep
Ripe-but-firm pears. Soft pears turn to sauce in the chute and can clog. Choose firm, fragrant apples. Soft mealy fruit juices watery and dull. Fuji, Gala, and Honeycrisp add gentle sweetness; Granny Smith keeps the glass sharper. Bright yellow lemons with thin skins juice easier than thick-rind warehouse fruit.
Core and cut. Slightly underripe pears juice cleaner than overripe bakery fruit. Core apples so seeds stay out of the pulp. Leave the peel on unless it is heavily waxed — peel still juicing is fine for most home batches. Peel and remove excess pith. Feed lemon near the end so acidity brightens without sitting in the pulp basket forever.
Wash everything you keep the peel on. Wax and grit show up as film and grit in the glass more than people expect.
Technique by machine
On a beginner centrifugal machine, cut produce smaller than the chute. Oversize wedges bounce and foam without adding yield.
Cold-press / masticating: slow feed, use reverse if the auger stalls, and keep batches modest so pulp does not bake into the screen.
No juicer? Blend-and-strain still counts. Press the bag firmly and secondary-strain if seed grit bothers you. See how to juice without a juicer for the full workflow.
Flavor, foam, and yield fixes
Too mild → lemon or ginger. Too thick → cucumber or apple. Brown color means oxidation — serve soon. Too sweet → more lemon or a tart apple. Too thin → another half apple or a denser partner like carrot or pear.
Separation after five minutes is ordinary. Stir or shake; do not assume the juice spoiled unless it smells fermented or sat warm for hours.
Target yield is 2 glasses; juicy winter produce can run slightly over, dry winter fruit slightly under.
Variations and related reading
Citrus-forward forks: more lemon/lime for sparkle, more orange for body.
Nearby recipes worth comparing: pear juice, apple juice, pear ginger juice.
This recipe also sits with winter juices and meal-prep juices for shopping-style browsing after you nail the base method.
Technique deep-dives that pair well here: how to juice pears; best juicer for apples; how to juice lemons.
Storage and cleanup
Fresh juice is a same-day food, not a weekly meal-prep potion. Cold sealed storage buys you a short window; it does not freeze flavor in amber.
Sticky tropical pulp and berry skins cling — a quick mid-batch rinse on big cook days prevents the “everything tastes like yesterday” problem.
This page is kitchen method and flavor only — not medical advice, not a detox protocol, and not a disease treatment plan.
Tools used
Beginner juicers handle firm pear; nut-milk bags cover soft blender paths.
Affiliate disclosure: As an Amazon Associate we may earn from qualifying purchases. Links go to Amazon.com search or product pages; we do not cloak URLs. We share buying criteria — we do not claim independent lab tests unless explicitly stated.
- Beginner juicer
Mild fruit batches.
- Glass juice bottles
Short fridge storage.
Best juicer for beginners → · Cold press vs centrifugal → · All juicer guides →
FAQ
Do I need a cold-press juicer for pear apple juice?
No. Cold-press can improve yield on greens and soft fruit and runs quieter, but a beginner centrifugal juicer still makes a solid glass if you feed steadily and clear the screen.
What if I only have a blender?
Blend chopped produce with a small amount of cold water, then strain firmly. You will get more foam and a little less clarity, but the flavor lane stays intact.
How do I fix flavor if the batch is off?
Too mild → lemon or ginger. Too thick → cucumber or apple. Brown color means oxidation — serve soon. Too sweet → more lemon or a tart apple. Too thin → another half apple or a denser partner like carrot or pear. Change one variable at a time and retaste.
How long does this juice keep?
Same day is best for flavor. Sealed and refrigerated, aim to finish within about 24 hours; shake before drinking. Longer storage tastes flat and can ferment.
How do I get more juice from the same produce?
Use ripe fruit, cut to chute size, alternate soft and firm pieces, and avoid overpacking the screen. Dry, rock-hard produce will always yield less.
Is foam a problem?
Home juice is often cloudy. Stir after it sits. Separation is ordinary; spoilage smells fermented or sour in a spoiled way, not just fruity.
Does this recipe make medical or detox claims?
No. It is a kitchen flavor and method page only — not medical advice, not a cleanse protocol, and not a treatment plan.
Related juices
- Pear Juice Recipe
- Apple Juice Recipe
- Pear Ginger Juice
- Lemon Apple Juice Recipe
- Fennel Apple Juice Recipe
Explore: Winter Juices · Meal-Prep Juices · Hydration Juices · Juice Recipes · Green Juices · Carrot Juices · Beet Juices · Celery Juices · Citrus Juices · Tropical Juices · Berry Juices · Juice Shots · Eat the Rainbow · Juicer Buying Guides · Red Juices · Orange & Yellow Juices · Purple Juices · Summer Juices · White & Brown Juices
Juice and produce pages are general kitchen information only. They are not intended to diagnose, treat, cure, or prevent any disease. Talk with a clinician for personal health questions.